Hello dear, today in this post I will tell you How do I download and install Android OS for PC or Laptop. It is very easy to setup android oreo (8.1) on your laptop or pc.
By using this method you can run android apps on PC. So just be with me and let’s get started.
How to Run Android on PC
Contents
To run android on your PC or Laptop, you have to download two files.
These are
- Unetbootin software – It is a software which helps you to install android iso file into a
usb drive or hard drive. - Download Unetbootin Software
- Android ISO file – It is an iso file type which includes all the files and folders of a particular version of the Android operating system. For example – Android marshmallow
- Download Android iso files here
Now follow the steps given below:
Step 1. Go to unetbootin website and download the
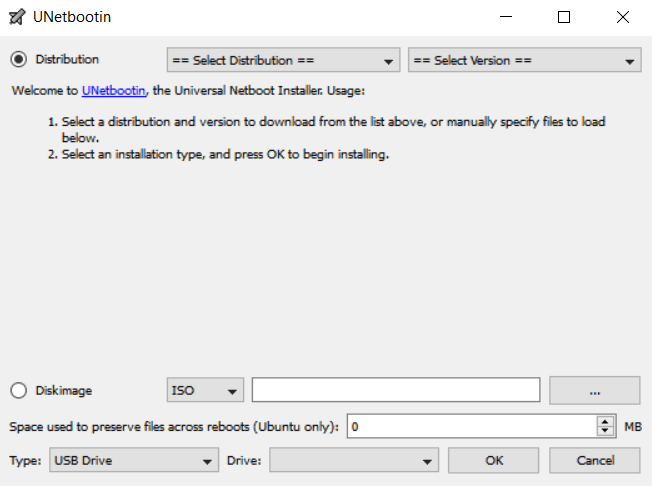
Step 2. Now you have to download the Android version which is in iso format. You can download any version whether it is Android KitKat or lollipop. But for this tutorial, I am going to download android oreo (8.1). This will be my android os for pc.
READ ALSO: How To Backup and Restore Whatsapp Chat
To download the android file go to
Select the Android version you want to download, for

Now it will open another link and you have to select the first link as shown in the image below:

Now you will see 2 forms of iso file :
- based on x64 operating systems
- based on x86 operation systems

My system is x86 OS. So I am downloading this version. It is only 675 MB in size.
And when you have downloaded this file on your PC, its time to install android iso files to your USB drive.
READ ALSO:
how to download subtitles of a movie on android phone
Step 3. Now plug in your USB drive. It must have around 4 to 8 GB of free space.
Once you have plugged in your USB drive. Navigate to my PC and format USB drive.

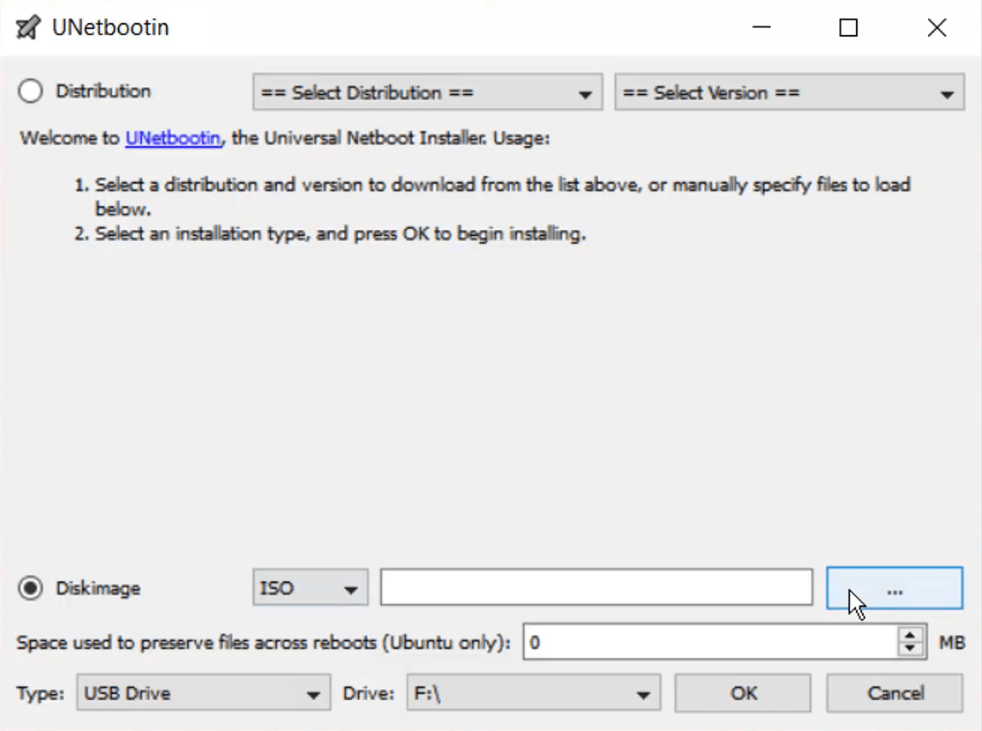
Step 4. Once your USB drive is formatted open unetbootin software again and select the Android iso file you have downloaded.
Just click on the three dots on the right bottom of this application and select the iso file as you can see in the image below:
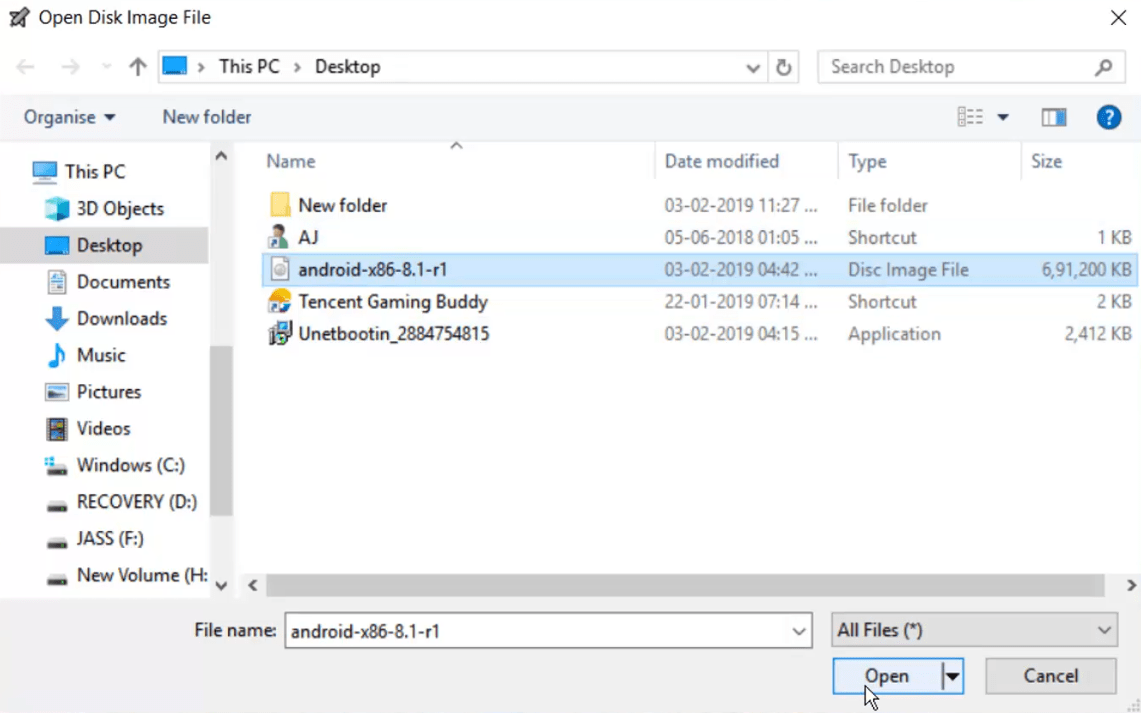
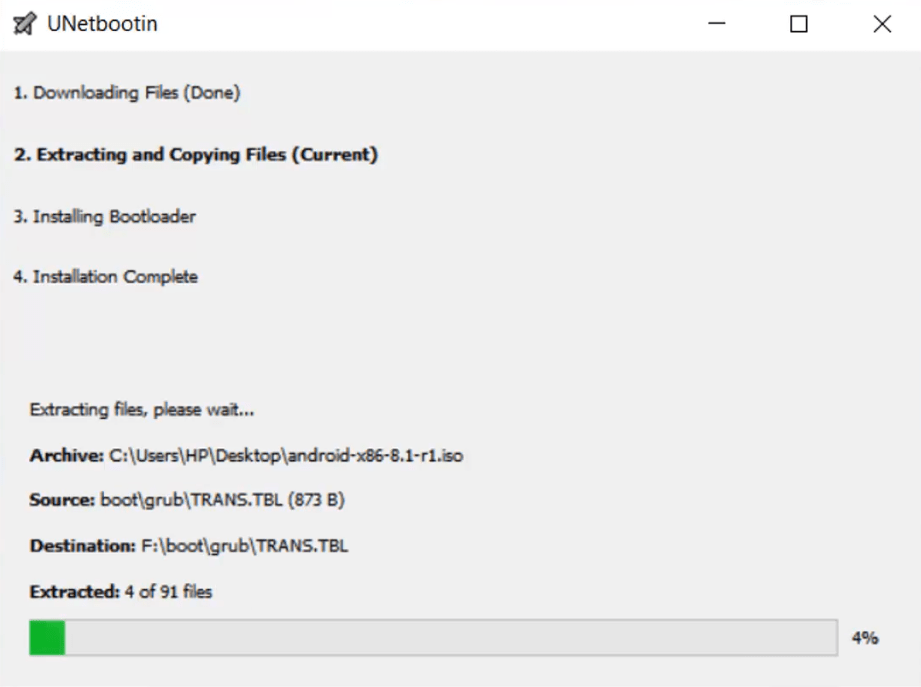
Once you select the iso file click on OK button and it will start copying installation files to
Here is a screenshot of copying files to usb:
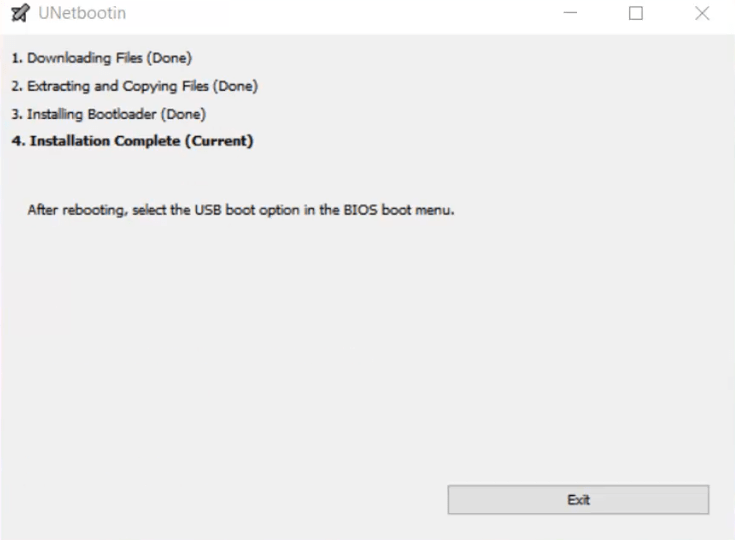
Step 5. It will take approx 3 to 5 minutes to finish this process. Once this process is completed, click on the exit button and after that, you have to reboot your pc or laptop.
Step 6. When your Laptop is restarting, you have to boot it into Bios mode.
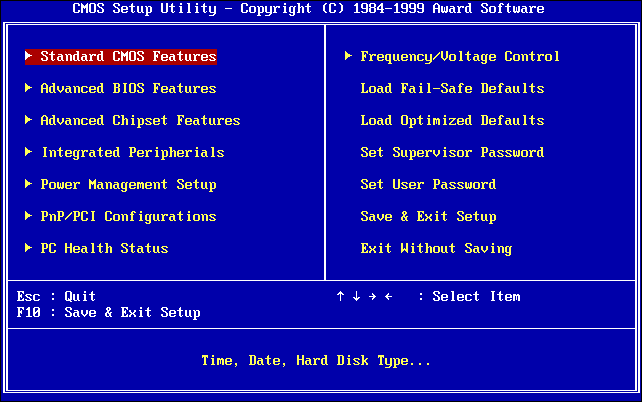
- While your laptop is restarting press F10 key on your keyboard or some models open it by pressing Del key on your keyboard
While your laptop is restarting press the F2 key on your keyboard and you will see Bios menu on your screen.
ALSO READ: How To Activate Windows 7 without Product Key and Make it Genuine Forever
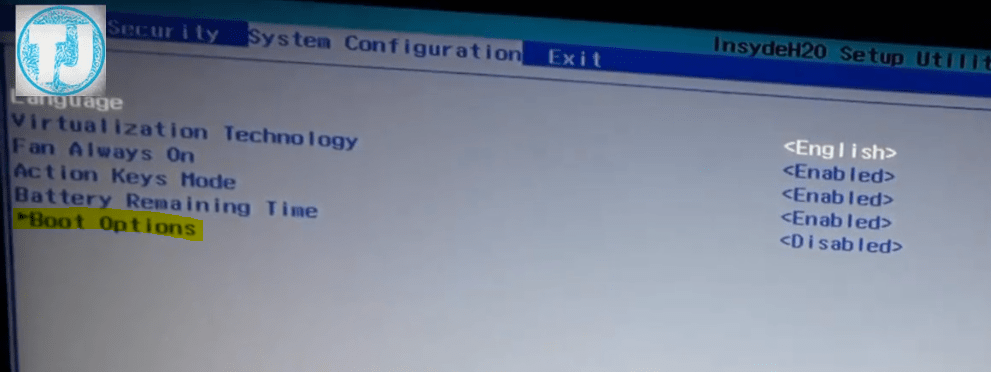
Step 7. When you are in the Bios menu, you have to navigate to system configuration and then select Boot options as you can see in the image below:
Step 8. Now you will see USB Diskette on key / USB Hard Disk option under UEFI Boot order.
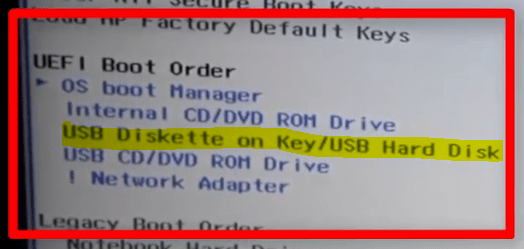
Step 9. You have to make your laptop or pc boot from your USB drive instead of the hard drive.
To do this use up and down keys or you will see how to move items up and down on the right side of the bios menu.
Now move
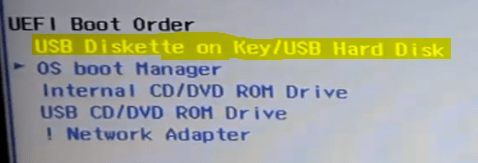
After that tap on the F10 key or F9 key according to your motherboard manufacturer and save changes.
ALSO READ: FRP BYPASS Easy (100% working) | How to bypass Google Account Verification

Step 10. When you press the Yes button on your keyboard your pc will reboot.

After reboot, if you see the message as shown in the image above, just press the ESC key and this message will disappear.
Step 11. Now you will see the Android installation menu as shown in the image below:

Here you have to select the very first option that is Android-x86 8.1-r1 Live.
This will live boot android from your USB drive.
Step 12. After this, you will see a blinking android text on your screen.

It will take some time to setup android. So just wait for 5 to 10 minutes and don’t turn off your pc.
Step 13. After this, you will see the android installation menu.
- First, you will see the Select Language option:

Here select your preferred language and select start.
- Next, you will see Connect WiFi option,

You can skip this if you want. I skipped this process personally.
- After this, you have to configure Date and Time

and click on the Next button.
Next, you will see Google Services Settings
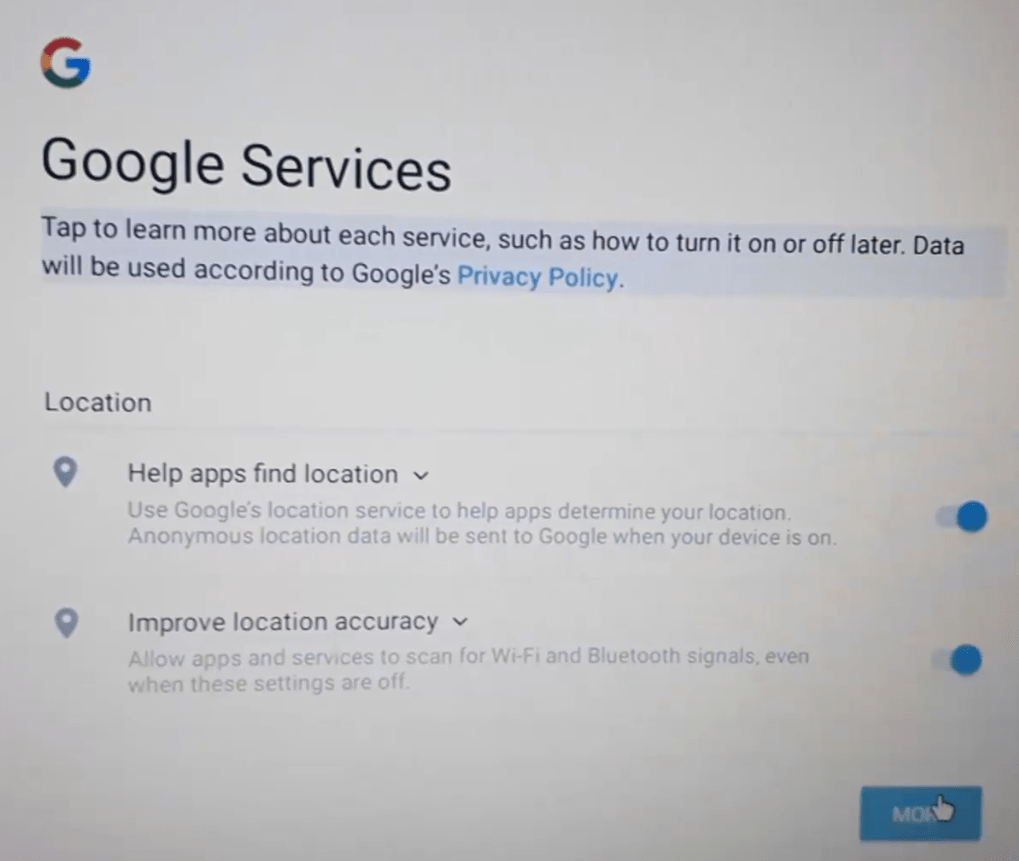
Now click on more button
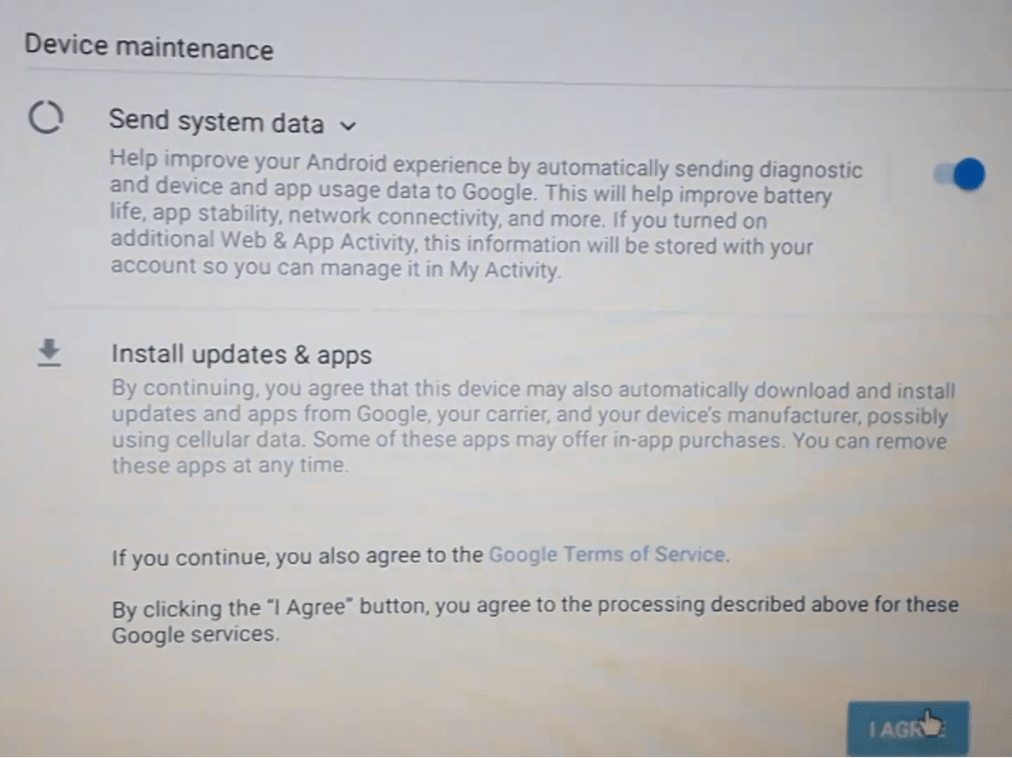
Click on the Agree button.
And after this, you will finally see the home page of android. You can see a screenshot taken on my laptop below:

Now let’s check what is the version of the Android installed on my laptop.
To do this I have to go to
Settings > About Tablet

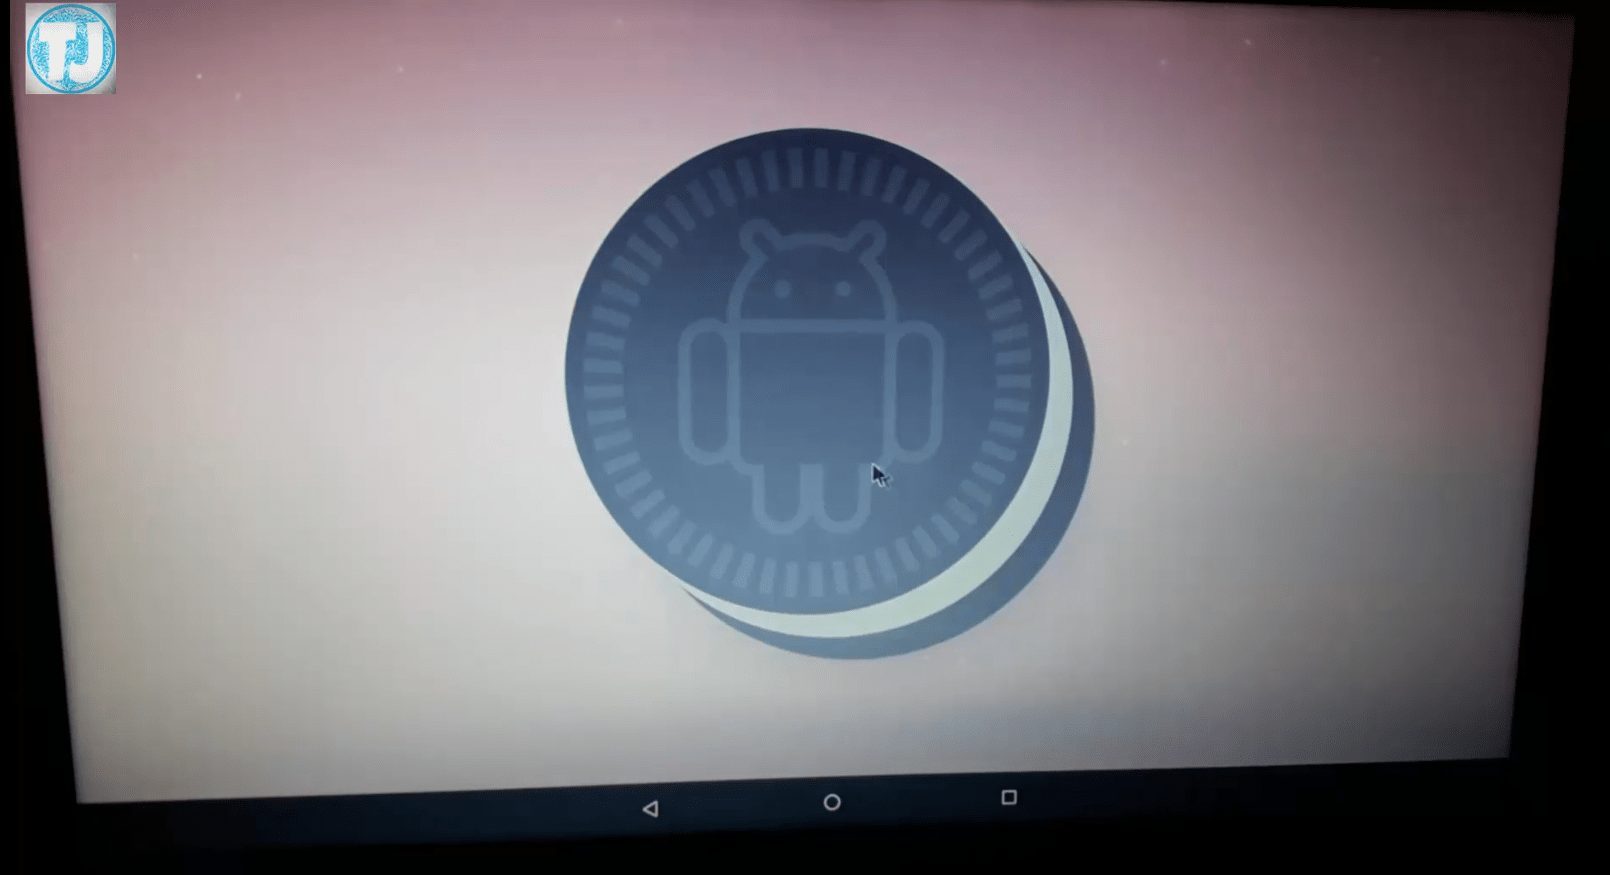
And here you can see its android 8.1 oreo and it is running smoothly on my laptop.
So, friends, this is how you can install android oreo on your pc or laptop. If you like this post, share it with your friends.
If you have some queries, you can ask me through comments.


[…] You May Like: How do I download and install Android OS for PC | Laptop […]
[…] How do I download and install Android OS for PC | Laptop […]