Hello friends, you just purchased a new laptop or PC and didn’t know how to Install Windows 10 from bootable USB, or you just wanted to upgrade from Windows 7 to the Windows 10 version. Don’t worry; I will help you install and activate Windows 10 without a product key on your laptop or PC in this post.
What is Microsoft Windows?
Contents
Microsoft Windows is an operating system developed and owned by Microsoft and is commonly known as Windows OS. There are many versions of Windows, namely Windows 95, XP, Vista, Windows 7, and Windows 10, and the latest version of Windows 11.
What are the requirements for Windows 10?
- Updated OS: Make sure that your laptop is running on Windows 7 or Windows 8.1,
- If you want to know which OS is currently running on your pc or laptop, visit Microsoft.
- If you want to download windows 7 or windows 8.1, follow the below links:
- Windows 7 SP1
- Windows 8.1 Update.
- Processor: 1 gigahertz (GHz) or faster processor or SoC
- RAM: 1 GB for 32-Bit CPUs and 2 GB for 64-Bit CPUs
- Hard disk space: 15 GB – 20 GB, depending upon the features you want to install on your Windows OS.
- GPU: You must have installed Direct X9 or a later version.
Watch YouTube Video to activate windows 10
Two ways to create Windows 10 Bootable USB drive:
- How to create Windows 10 bootable USB using the Media Creation Tool
- How to create a Windows 10 bootable USB with Rufus
1. How to create Windows 10 bootable USB using the Media Creation Tool
In this section, I will guide you through the way how you can create Windows 10 bootable USB drive using the Microsoft media creation tool.
- First, go to Windows 10 media creation.
You will see the website page as shown below:
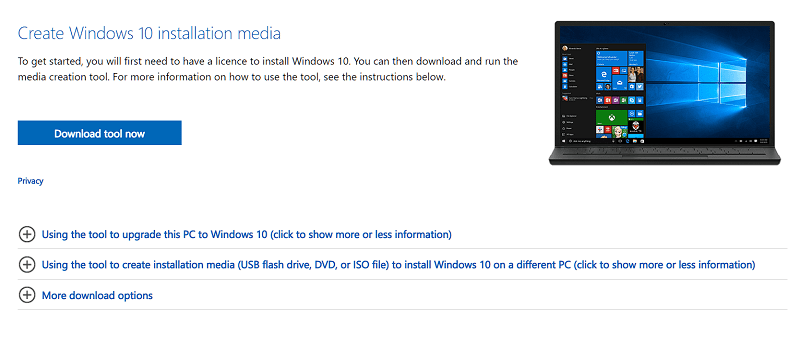
2. Now click on the download tool now button and it will download the application file. Now click on the show all button then click on the application to launch the .exe file.

when you click on the setup, and press yes to authorize to run it. Then wait for some time so that setup starts.
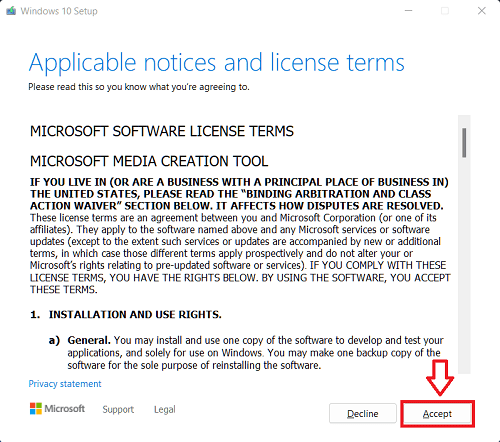
3. Now, you will Accept notices and license terms, click on the accept button to continue.
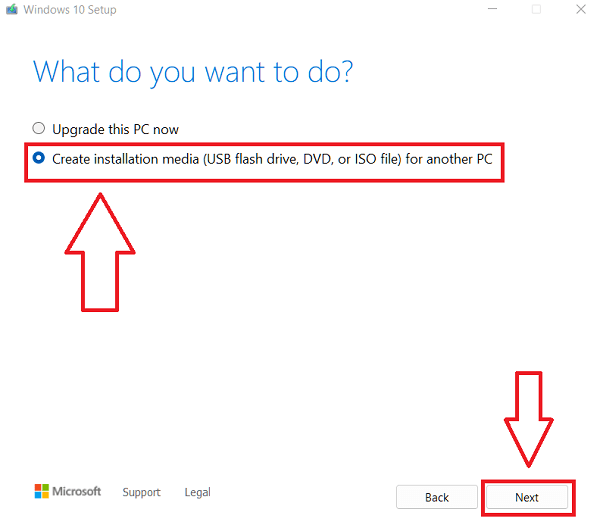
4. Now, the setup will ask you what to do. Here we have to select Create Installation Media with a USB flash drive and click next button.
Also Read: Bought Minecraft But Can Only Play Demo Version
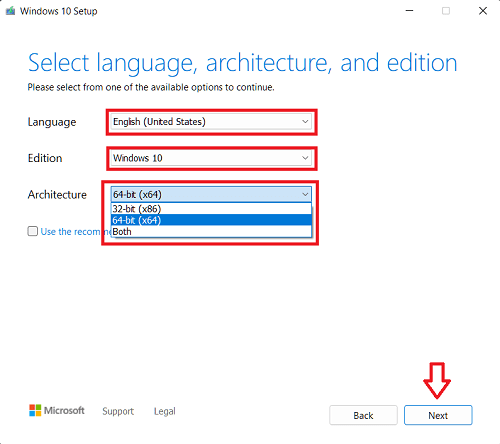
5. Now, we have to choose the language, Windows edition, and architecture for the USB media creation for Windows 10. If you want to edit the options, just uncheck the option by using the recommended options for this PC.
6. After this, the setup will ask you to choose which source you want to use to create a Windows 10 bootable drive. You have two options:
You can change the language and Windows edition. If you want to make a USB for 32-bit or 64-bit Windows 10, you can change this in the architecture option.
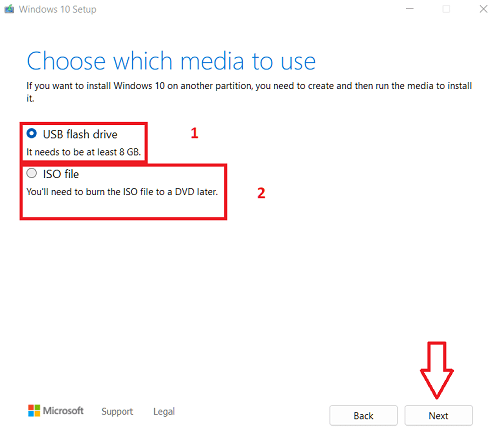
- USB Flash Drive: must be bigger than 8.1 GB
- ISO file: to create an iso file of Windows to burn it on a DVD drive
I am creating a Windows bootable USB drive so that I will select a USB flash drive, and before clicking on the Next button, plug your USB drive into your PC or laptop.
7. Now select ISO File and click on Next as shown in the image below
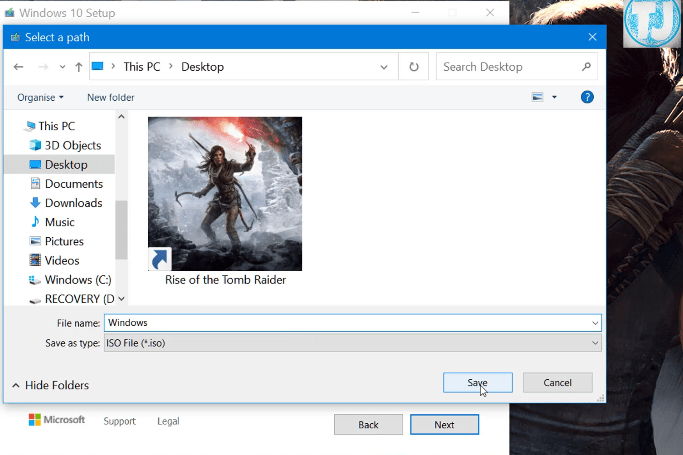
8. Now it will download the ISO file, take some time, and copy the iso file onto your usb drive.
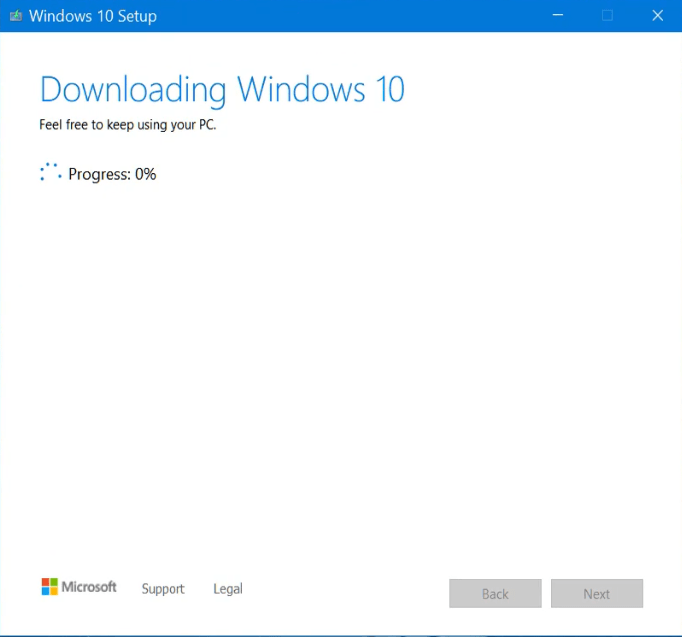
Now you are ready to install Windows 10 on your laptop/PC.
Also Read: How to Change your Mouse Cursor
Now you have successfully created the USB bootable drive. Now you can install and activate Windows 10 on your laptop or PC.
2. How to create a Windows 10 bootable USB with Rufus
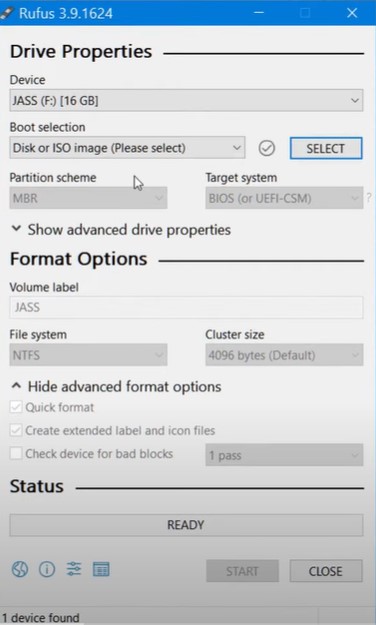
- First, you have to download the Rufus software. Go to Google, search Rufus, and download it.
- When you have downloaded the setup, insert the USB you wanted to make bootable.
- Now double-click on the Rufus application and it will automatically detect your USB drive.
- Now in Boot selection, you have to select Disk or ISO image and select the Windows 10 iso file.
- In the file system, select NTFS and quick format and click on start.
- After that, the software will format your USB drive, copy the Windows 10 files onto it, and make the USB bootable.
- Once done you will see a pop-up as shown with a message.
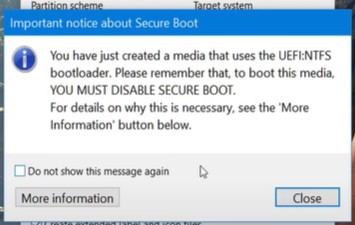
Now you have successfully created a bootable USB drive using Rufus software.
Installing Windows 10 on a Laptop or PC.
- insert the USB drive and go to the laptop or pc’s BIOS menu. Different laptops has different F Keys to enter the bios menu such as f7, f8, f9, etc. i am using a HP laptop, so I have used f10 key to enter the boot menu once we are restarting the laptop.
- Now go to system configuration.
- Navigate to the UEFI BOOT ORDER and make sure the USB Diskette on the key/ USB hard drive is at the top in order.
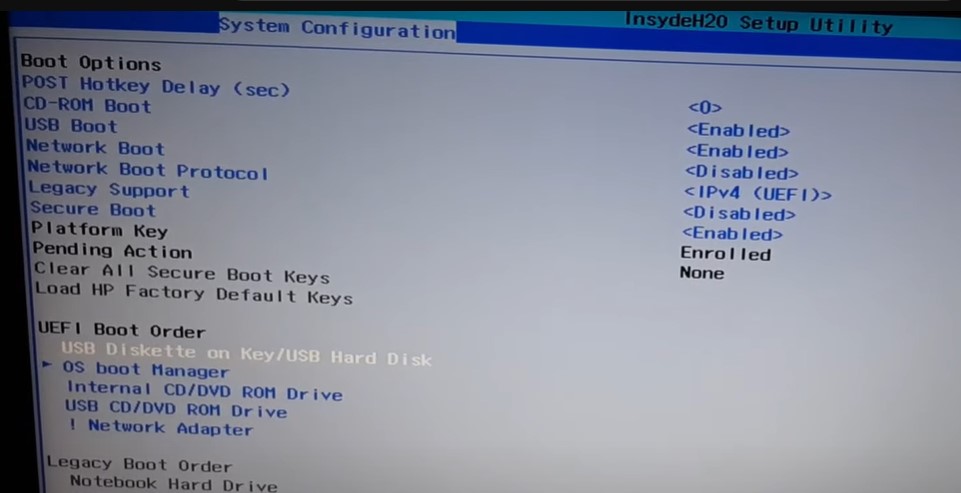
4. Once done, click on f10 key and save the settings. Now your laptop will restart and automatically detect the bootable USB drive. After that you will be able to see windows 10 setup screen as shown in the screenshot below.
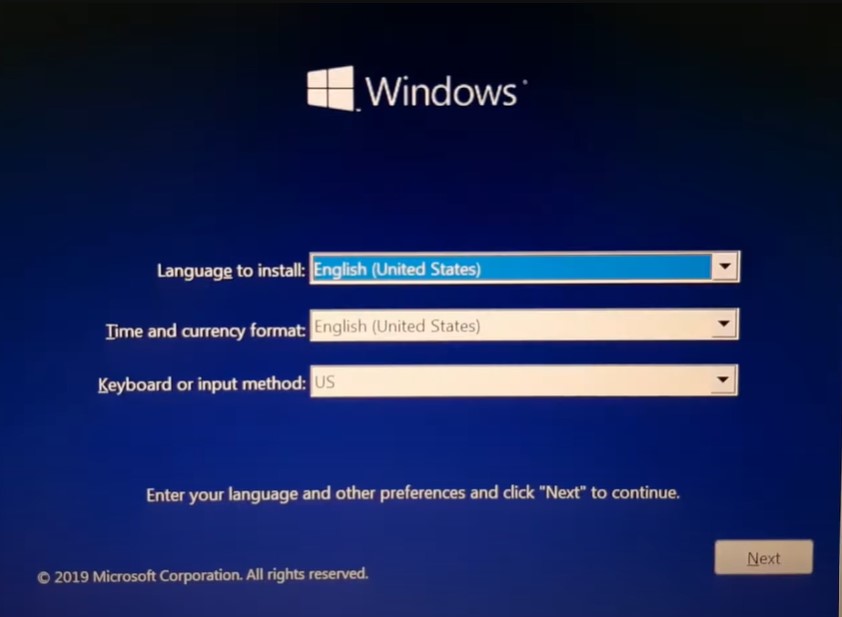
5. Here you can select the language, time and keyboard language and click on next.
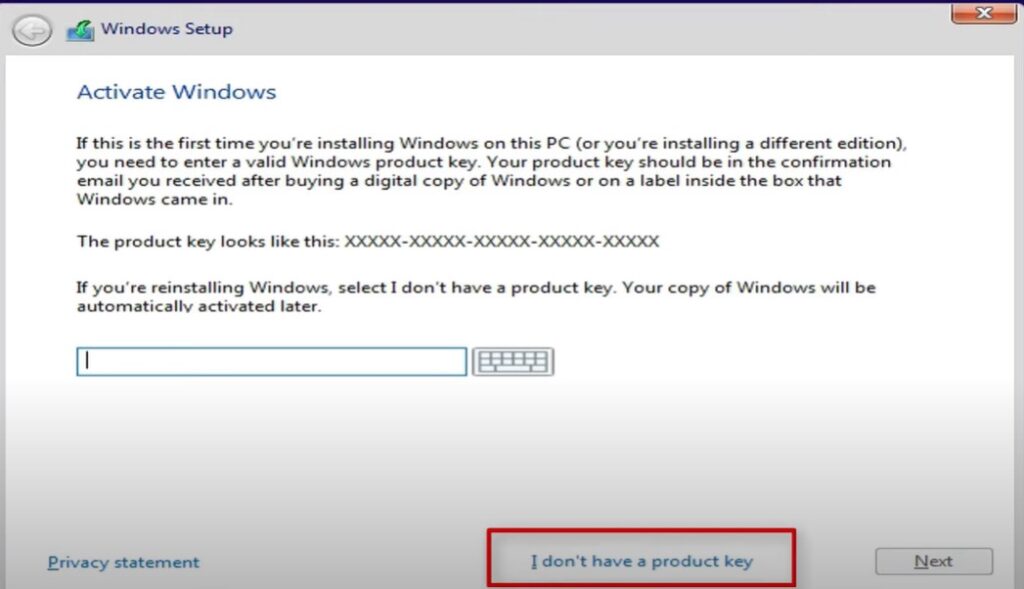
6. Now it will ask for the activation key, here just select I don’t have a product key and click on next button.
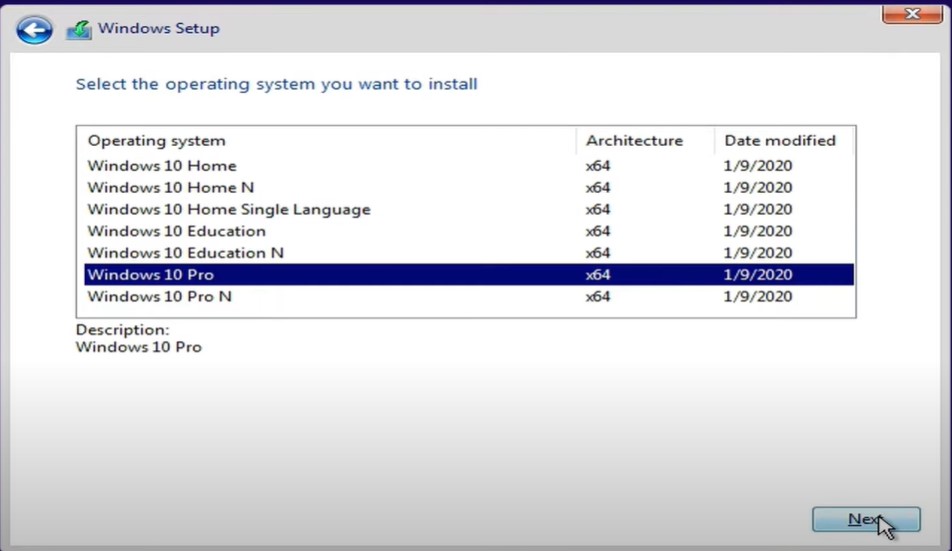
7. Now you can select which windows 10 version you want to install on your PC or laptop such as home, home n, windows 10 education, windows 10 pro, etc. I have selected windows pro and click on next.
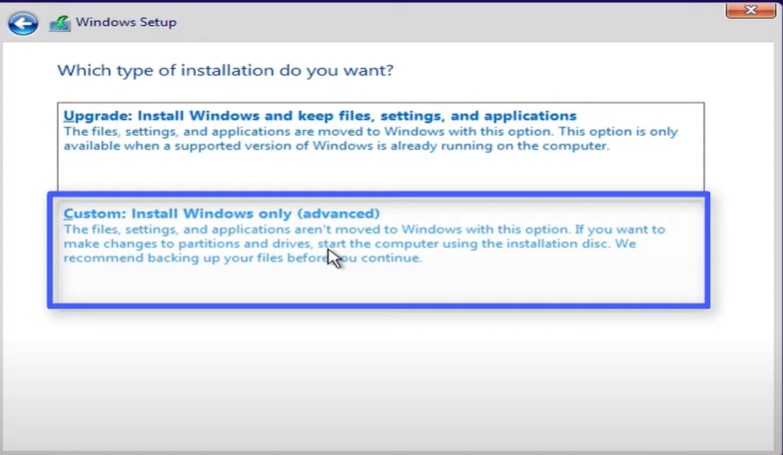
8. Now you’ll get two options to install the setup.
First one is upgrade – if you are upgrading from windows 7,8 or any previous version use the upgrade option.
Second option is Custom install – This option is for the users who wanted to install completely new version by formating the hard disk. I have chosen this option.
9. Now you’ll see the option to choose the disk drive in which you wanted to install windows as shown below.
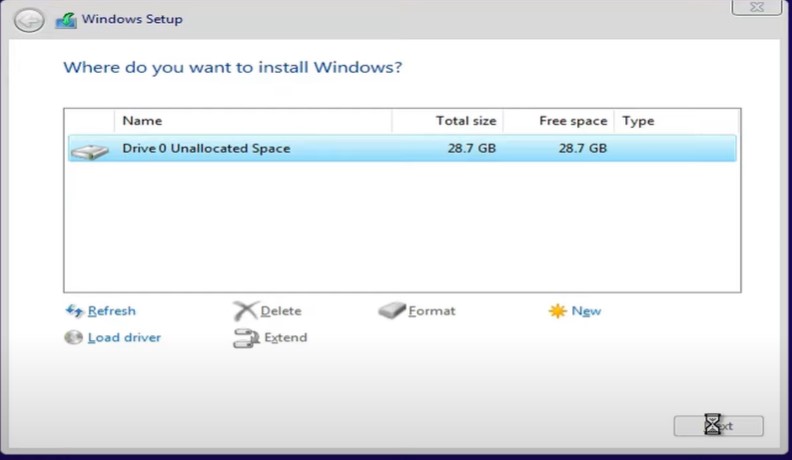
Here you can delete, format or extent the disk partitions. Once you selected your disk to install, click Next.
Now windows will copy all the files to the hard drive and install windows 10 on your laptop or PC.
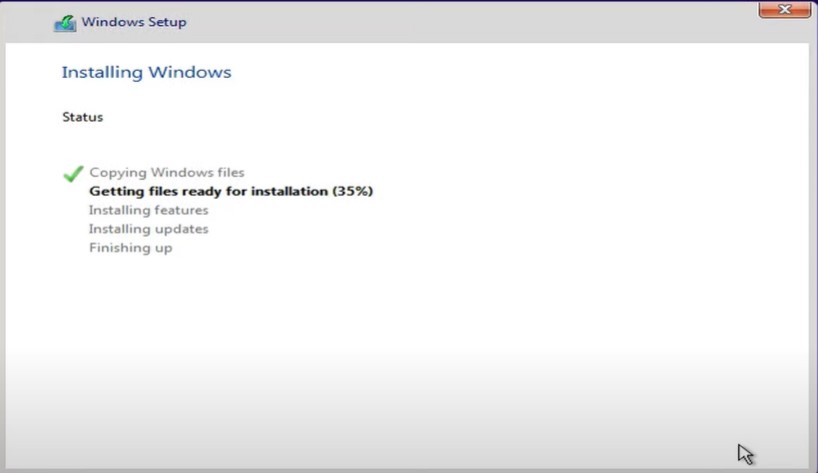
Now you have successfully installed windows 10 on your PC or laptop.

You can comment below if you have any questions regarding the process. Thanks for reading.

